Tuesday, November 29, 2011

Random Posts Widget For Blogger/Blogspot

Random Posts Widget For Blogger/Blogspot
This widget can definitely bring some excitement to your blogger powered blog. Letting your readers surf your blog to the fullest extent by creating a link to a random post in your blog's sidebar.

Adding a Random posts widget is very easy...
Simply log in to Blogger, go to Layout, click on "Add a Gadget", and select it as "HTML/JavaScript" type.

And finally paste this code in to it:

<script type="text/javascript">

var randarray = new Array();var l=0;var flag;

var numofpost=8;function randomposts(json){

var total = parseInt(json.feed.openSearch$totalResults.$t,10);

for(i=0;i < numofpost;){flag=0;randarray.length=numofpost;l=Math.floor(Math.random()*total);for(j in randarray){if(l==randarray[j]){ flag=1;}}

if(flag==0&&l!=0){randarray[i++]=l;}}document.write('<ul>');

for(n in randarray){ var p=randarray[n];var entry=json.feed.entry[p-1];

for(k=0; k < entry.link.length; k++){if(entry.link[k].rel=='alternate'){var item = "<li>" + "<a href=" + entry.link[k].href + ">" + entry.title.$t + "</a> </li>";

document.write(item);}}

}document.write('</ul>');}

</script>

<script src="/feeds/posts/default?alt=json-in-script&start-index=1&max-results=1000&callback=randomposts" type="text/javascript"></script>


- Edit the code numofpost=8;function to change the number of posts being displayed in the widget.

- NOW CLICK SAVE TEMPLATE

Monday, November 28, 2011

How To Add Yahoo Smiley Emoticons Blogger/BlogSpot Comment Form

How To Add Yahoo Smiley Emoticons Blogger/BlogSpot Comment Form

STEP #1
First log in to Blogger
Then go to Layout -> click on "Edit HTML" tab, and click on "Expand Widget Templates" tick-box.


Now find this code :
<b:if cond='data:post.embedCommentForm'>
<b:include data='post' name='comment-form'/>


Now right IN-BETWEEN those two lines, add all these lines:
<div style='-moz-background-clip: -moz-initial; -moz-background-origin: -moz-initial; -moz-background-inline-policy: -moz-initial; width: 369; text-align: left; border: 1px solid #cccccc; padding: 5px; background: #eeeddf; height:86'>

<b>

<img border='0' height='18' src='http://us.i1.yimg.com/us.yimg.com/i/mesg/emoticons7/21.gif' width='18'/> :))

<img border='0' height='18' src='http://us.i1.yimg.com/us.yimg.com/i/mesg/emoticons7/71.gif' width='18'/> ;))

<img border='0' height='18' src='http://us.i1.yimg.com/us.yimg.com/i/mesg/emoticons7/5.gif' width='18'/> ;;)

<img border='0' height='18' src='http://us.i1.yimg.com/us.yimg.com/i/mesg/emoticons7/4.gif' width='18'/> :D

<img border='0' height='18' src='http://us.i1.yimg.com/us.yimg.com/i/mesg/emoticons7/3.gif' width='18'/> ;)

<img border='0' height='18' src='http://us.i1.yimg.com/us.yimg.com/i/mesg/emoticons7/10.gif' width='18'/> :p

<img border='0' height='18' src='http://us.i1.yimg.com/us.yimg.com/i/mesg/emoticons7/20.gif' width='22'/> :((

<img border='0' height='18' src='http://us.i1.yimg.com/us.yimg.com/i/mesg/emoticons7/1.gif' width='18'/> :)

<img border='0' height='18' src='http://us.i1.yimg.com/us.yimg.com/i/mesg/emoticons7/2.gif' width='18'/> :(

<img border='0' height='18' src='http://us.i1.yimg.com/us.yimg.com/i/mesg/emoticons7/8.gif' width='18'/> :X

<img border='0' height='18' src='http://us.i1.yimg.com/us.yimg.com/i/mesg/emoticons7/12.gif' width='18'/> =((

<img border='0' height='18' src='http://us.i1.yimg.com/us.yimg.com/i/mesg/emoticons7/13.gif' width='18'/> :-o

<img border='0' height='18' src='http://us.i1.yimg.com/us.yimg.com/i/mesg/emoticons7/7.gif' width='20'/> :-/

<img border='0' height='18' src='http://us.i1.yimg.com/us.yimg.com/i/mesg/emoticons7/11.gif' width='18'/> :-*

<img border='0' height='18' src='http://us.i1.yimg.com/us.yimg.com/i/mesg/emoticons7/22.gif' width='18'/> :|

<img border='0' height='18' src='http://us.i1.yimg.com/us.yimg.com/i/mesg/emoticons7/35.gif' width='24'/> 8-}

<img border='0' height='18' src='http://us.i1.yimg.com/us.yimg.com/i/mesg/emoticons7/100.gif' width='31'/> :)]

<img border='0' height='18' src='http://us.i1.yimg.com/us.yimg.com/i/mesg/emoticons7/102.gif' width='44'/> ~x(

<img border='0' height='18' src='http://us.i1.yimg.com/us.yimg.com/i/mesg/emoticons7/104.gif' width='30'/> :-t

<img border='0' height='18' src='http://us.i1.yimg.com/us.yimg.com/i/mesg/emoticons7/66.gif' width='18'/> b-(

<img border='0' height='18' src='http://us.i1.yimg.com/us.yimg.com/i/mesg/emoticons7/62.gif' width='18'/> :-L

<img border='0' height='18' src='http://us.i1.yimg.com/us.yimg.com/i/mesg/emoticons7/14.gif' width='34'/> x(

<img border='0' height='18' src='http://us.i1.yimg.com/us.yimg.com/i/mesg/emoticons7/24.gif' width='30'/> =))

</b>

</div>


STEP #2

Now find this code in the template:
</body>


And just BEFORE it, add this line:

<script src='http://files.main.bloggerstop.net/uploads/3/0/2/5/3025338/smiley.js' type='text/javascript'/><noscript><a href="http://bdlab.blogspot.com" target="_blank"><span style="font-size: x-small;">Add Smilies</span></a></noscript>


Now click Save Template


Sunday, November 27, 2011

How To Improve SEO Friendly For Blogger/Blogspot

How To Improve SEO Friendly For Blogger/Blogspot


SEO can be started by choosing a SEO friendly template. Basic blogger templates are usually have no SEO friendly. Beside Wordpress, Blogger is a free blog platform that majority used by world blogger. It has simple template, and easy to modify. Basically, to make it more SEO friendly, a blogger template must have title tags that match with title post, meta description that describe post content, and H1 for title to make it more relevant with search engine. Most of basic blogger template have no SEO friendly setting, and need to modify it to have SEO friendly.

SEO friendly setting need to be modify in blogger template are:

1. Title tags

Some of blogger template have title tags like this:

Blog Title - Post Title

This setting makes post title less significant than blog title, so the title tags can be irrelevant with post content in the view of search engine. Blogger template need to be modified to change title tags using post title.

2. Add meta description tags
By default, basic blogger template setting have no meta tags setting. We need to modify template so it have meta tags for main homepage, and add different meta tags automatically for every post. Different meta tags for every post can be generated from post title. Meta description give a description about the content of your blog. Most of search engine use meta description to find relevant content.

3. Post tag
Use H1 for post title to make your posting more relevant with search engine, and SEO friendly.

Friday, November 25, 2011

Insert Adsense Into Blogger/Blogspot Post

Insert Adsense Into Blogger/Blogspot Post
Adsense in blogger post is a such good placement. Here the way to do that. First, parse your adsense code so it can be inserted in Blogger XML Code. Blogcrowds have tool for parsing Google adsense code to Blogger XML Code. Just put your adsense code into Parse HTML box, then click Parse. Save your adsense code that have been parsed.


Next step is place your result into blogger template code. Go to Layout section, then Edit HTML. Check Expand Widget Templates. Find in your blogger template code something like this:
   <data:post.body/>


Place the code before that string if you want your adsense appear before post body.
You can also place your adsense after post body, just find code like this,
   <div class='post-footer-line post-footer-line-1'>


and then place your code after that string.

You can display adsense only in single blogger posting. See my another article in this blog about show adsense in blogger post or in home page only.

Wednesday, November 23, 2011

How To Add jQuery Horizontal Dropdown Menu Blogger/Blogspot

How To Add jQuery Horizontal Dropdown Menu Blogger/Blogspot

Instructions To Follow:
STEP #1
Log in to Blogger, go to Layout -> Edit HTML
and mark the tick box "Expand Widget Templates"

STEP #2
Now find (CTRL+F) this code in the template:
</head>

And immediately before it, paste this code:
<script src='http://code.jquery.com/jquery-latest.js' type='text/javascript'/>
<script type='text/javascript'>
$(document).ready(function(){

$(&quot;ul.subnav&quot;).parent().append(&quot;<span/>&quot;); //Only shows drop down trigger when js is enabled - Adds empty span tag after ul.subnav

$(&quot;ul.topnav li span&quot;).click(function() { //When trigger is clicked...

//Following events are applied to the subnav itself (moving subnav up and down)
$(this).parent().find(&quot;ul.subnav&quot;).slideDown(&#39;fast&#39;).show(); //Drop down the subnav on click

$(this).parent().hover(function() {
}, function(){
$(this).parent().find(&quot;ul.subnav&quot;).slideUp(&#39;slow&#39;); //When the mouse hovers out of the subnav, move it back up
});

//Following events are applied to the trigger (Hover events for the trigger)
}).hover(function() {
$(this).addClass(&quot;subhover&quot;); //On hover over, add class &quot;subhover&quot;
}, function(){ //On Hover Out
$(this).removeClass(&quot;subhover&quot;); //On hover out, remove class &quot;subhover&quot;
});

});
</script>
<style type='text/css'>
ul.topnav {
list-style: none;
padding: 0 20px;
margin: 0;
float: left;
width: 100%;
background: #222;
font-size: 1.2em;
background: url(https://blogger.googleusercontent.com/img/b/R29vZ2xl/AVvXsEhsVHCU3rx_-EXGkg6Ya1y9kAJ2Ddd5S_WAbGhh1BcYTWiWZh3TCMWBb0zgxf_UeDXmQAeR6GlIk-qqfuFQAfjAX72O0HKhiuEdr9V8xnd0lohQw9jdjK1p5_b_4vF1J4hRxmNwgmiyuO1S/) repeat-x;
}
ul.topnav li {
float: left;
margin: 0;
padding: 0 15px 0 0;
position: relative; /*--Declare X and Y axis base--*/
}
ul.topnav li a{
padding: 10px 5px;
color: #fff;
display: block;
text-decoration: none;
float: left;
}
ul.topnav li a:hover{
background: url(https://blogger.googleusercontent.com/img/b/R29vZ2xl/AVvXsEg0wzkZgsPLM_hV_S-i3xIaw3UnztDabM8PcHIIJE_GeTkG3rjlb8xw_Y9JHc2tIOOaxTdXsWJpUif65jnO_0hJkyEyIt289ImeJgRKTkXVi1YRP9P_AyFBFfU1Uh8m17GBZLhrj8ROhog5/) no-repeat center top;
}
ul.topnav li span { /*--Drop down trigger styles--*/
width: 17px;
height: 35px;
float: left;
background: url(https://blogger.googleusercontent.com/img/b/R29vZ2xl/AVvXsEjzqup0EMKtKrFvmvioGV_m6R4qO4NmB9Nnxxw9_it1A_fdGEEMOZirxcOKhfHlCmNoLuD3M0HpEhmRmvy7jlzbgouS20B5RMkLcI1rsCPNdRrqELOEygabqBvBYlLAghXmI0QKDEEGnLmY/) no-repeat center top;
}
ul.topnav li span.subhover {background-position: center bottom; cursor: pointer;} /*--Hover effect for trigger--*/
ul.topnav li ul.subnav {
list-style: none;
position: absolute; /*--Important - Keeps subnav from affecting main navigation flow--*/
left: 0; top: 35px;
background: #333;
margin: 0; padding: 0;
display: none;
float: left;
width: 170px;
-moz-border-radius-bottomleft: 5px;
-moz-border-radius-bottomright: 5px;
-webkit-border-bottom-left-radius: 5px;
-webkit-border-bottom-right-radius: 5px;
border: 1px solid #111;
}
ul.topnav li ul.subnav li{
margin: 0; padding: 0;
border-top: 1px solid #252525; /*--Create bevel effect--*/
border-bottom: 1px solid #444; /*--Create bevel effect--*/
clear: both;
width: 170px;
}
html ul.topnav li ul.subnav li a {
float: left;
width: 145px;
background: #333 url(https://blogger.googleusercontent.com/img/b/R29vZ2xl/AVvXsEhY2I805fBjB4CuufGTLYrlSWGsuLI53s83HwgIaMlhM0Y6fzNhq4XsX00HqjjeK7OG94EdU1fZN_a7X1XTWAMtJyn4SS8buVcdcqyaBq_7vAvvoLKq31nlpA-1slaXDvbNNEHJvuP_WuLO/) no-repeat 10px center;
padding-left: 20px;
}
html ul.topnav li ul.subnav li a:hover { /*--Hover effect for subnav links--*/
background: #222 url(https://blogger.googleusercontent.com/img/b/R29vZ2xl/AVvXsEhY2I805fBjB4CuufGTLYrlSWGsuLI53s83HwgIaMlhM0Y6fzNhq4XsX00HqjjeK7OG94EdU1fZN_a7X1XTWAMtJyn4SS8buVcdcqyaBq_7vAvvoLKq31nlpA-1slaXDvbNNEHJvuP_WuLO/) no-repeat 10px center;
}
#header img {
margin: 20px 0 10px;
}
</style>


Now click Save Template

Note:
Please host image yourself.
You can change width,height,color,... as your choice.

3.Now go to Layout-->Page Element and click on "Add a gadget".

4.Select "html/java script" and add the code given below and click save.

<ul class="topnav">

<li><a href="#">Home</a></li>
<li>
<a href="#">Tutorials</a>
<ul class="subnav">
<li><a href="#">HTML Tutorials</a></li>
<li><a href="#">CSS Tutorials</a></li>
<li><a href="#">PHP Tutorials</a></li>
<li><a href="#">SQL Tutorials</a></li>
<li><a href="#">jQuery Tutorials</a></li>
</ul>
</li>
<li>
<a href="#">Templates</a>
<ul class="subnav">
<li><a href="#">1 Column</a></li>
<li><a href="#">2 Column</a></li>
<li><a href="#">3 Column</a></li>
<li><a href="#">4 Column</a></li>
<li><a href="#">Premium</a></li>
<li><a href="#">Buy Now</a></li>
</ul>
</li>
<li><a href="#">About Us</a></li>
<li><a href="#">Advertise</a></li>
<li><a href="#">Subscribe</a></li>
<li><a href="#">Contact Us</a></li>

</ul>


Now click Save


thanks to bdlab

Sunday, November 20, 2011

Related Posts Widget with thumbnails for Blogger / Blogspot

Related Posts Widget with thumbnails for Blogger / Blogspot

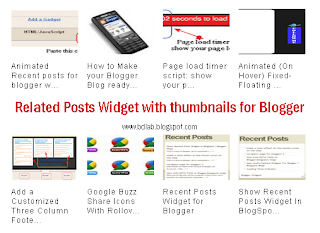
One of the best way to increase page views and readership is using a related posts plugin. After the huge success of thumbnail realated posts widget by linkwithin, Aneesh developed the same widget using custom code which was indeed more reliable and totally customizable.


Now Like wise Wordpress Blogger Users can also have Related Posts with Thumbnails in Blogspot Blogs.To increase page views per user this widget can be very helpful, you can easily display the Related Posts with thumbnails below every post or below the post area with very ease.


Related Posts Widget with Thumbnails for Blogger
Here are the detailed steps to install the related posts widget for blogger with thumbnails


STEP #1
Log in to Blogger -> Layout -> Edit HTML and select the tick-boxExpand Widget Templates
Then, find (CTRL+F) this code in the template:
</head>


And immediately before it, paste this code:
<!--Related Posts with thumbnails Scripts bdlab.blogspot.com-->
<!-- remove --><b:if cond='data:blog.pageType == &quot;item&quot;'>
<style type="text/css">
#related-posts {
float:center;
text-transform:none;
height:100%;
min-height:100%;
padding-top:5px;
padding-left:5px;
}

#related-posts h2{
font-size: 1.6em;
font-weight: bold;
color: black;
font-family: Georgia, &#8220;Times New Roman&#8221;, Times, serif;
margin-bottom: 0.75em;
margin-top: 0em;
padding-top: 0em;
}
#related-posts a{
color:black;
}
#related-posts a:hover{
color:black;
}

#related-posts a:hover {
background-color:#d4eaf2;
}
</style>
<script type='text/javascript'>
var defaultnoimage="https://blogger.googleusercontent.com/img/b/R29vZ2xl/AVvXsEhz43TrD3_ktLwKbUHcnswrxlmDI4DI1BT6mRAWWxtG5v5XvPs13uPq5UIab3YoF0_2kanDIBMp9fo0CCUHQera2gHU2XTGyHmUdMujX24GXCS1ejeU0pzX0GTauN1bMqZM3tVrwY_KTQGc/s1600/no+Image+1.png";
var maxresults=5;
var splittercolor="#d4eaf2";
var relatedpoststitle="Related Posts";
</script>
<script src='https://sites.google.com/site/bdlab12/javascript123/bdlab-related-posts-with-thumbnails-for-blogger-pro.txt' type='text/javascript'/>
<!-- remove --></b:if>
<!--Related Posts with thumbnails Scripts bdlab.blogspot.com-->


STEP #2:
Now find this code in the template:
<div class='post-footer-line post-footer-line-1'/>


If you cant find it then try finding this one

<p class='post-footer-line post-footer-line-1'/>


Now immediately after any of these lines(whichever you could find) place this code snippet

<!-- Related Posts with Thumbnails Code Start bdlab.blogspot.com-->
<!-- remove --><b:if cond='data:blog.pageType == &quot;item&quot;'>
<div id='related-posts'>
<b:loop values='data:post.labels' var='label'>
<b:if cond='data:label.isLast != &quot;true&quot;'>
</b:if>
<script expr:src='&quot;/feeds/posts/default/-/&quot; + data:label.name + &quot;?alt=json-in-script&amp;callback=related_results_labels_thumbs&amp;max-results=5&quot;' type='text/javascript'/></b:loop>
<script type='text/javascript'>
removeRelatedDuplicates_thumbs();
printRelatedLabels_thumbs(&quot;<data:post.url/>&quot;);
</script>
</div><div style='clear:both'/>
<!-- remove --></b:if>
<b:if cond='data:blog.url == data:blog.homepageUrl'><b:if cond='data:post.isFirstPost'>
<a href='http://bdlab.blogspot.com'><img style="border: 0" alt="Related Posts Widget For Blogger with Thumbnails" src="https://blogger.googleusercontent.com/img/b/R29vZ2xl/AVvXsEiIRCcQOMLv0OsMEO7hnKyclCyrBscp9WrnwKVxbwBONgJsdwyT3Sk8LbgYassw2HPfDC3p73He0VZ27Y0zDEqdYJKJ9d9HRxH8AvhlAZmoSqdG26KJQ9m0Eh6UErFhC93Ar9IdwGvBkUqU/s1600/blogger-widgets.png" /></a><a href='http://bdlab.blogspot.com' ><img style="border: 0" alt="Blogger Templates" src="https://blogger.googleusercontent.com/img/b/R29vZ2xl/AVvXsEiuKVVUFAS5YFvIzF2XjC_3vFTHVs0vX2Eqx0iv-ZPLxLiPuIKMqf9yvvXysjQOFM7dmyj-RUsCWNX5aHpsNnz4f4RYrzxNBQDp3Wn3beJxnlUD1dV6ARmNvuZlMAq7oPz4G1OB-UlGWQIX/s1600/blogger-templates.png" /></a>
</b:if></b:if>
<!-- Related Posts with Thumbnails Code End bdlab.blogspot.com-->


Now Click "Save Template"

You can adjust the maximum number of related posts being displayed by editing this line in the code.

var maxresults=5;

To edit the title of the widget you can change this line of code

var relatedpoststitle="Related Posts";

To change the default thumbnail, you can edit this line of code

var defaultnoimage="https://blogger.googleusercontent.com/img/b/R29vZ2xl/AVvXsEhz43TrD3_ktLwKbUHcnswrxlmDI4DI1BT6mRAWWxtG5v5XvPs13uPq5UIab3YoF0_2kanDIBMp9fo0CCUHQera2gHU2XTGyHmUdMujX24GXCS1ejeU0pzX0GTauN1bMqZM3tVrwY_KTQGc/s1600/no+Image+1.png";

To Change the Colour of the Splitter Line , edit

var splittercolor="#d4eaf2";

Finish
Friday, November 18, 2011

How to Auto Show Image/Thumbnail Tooltip in Blogger / Blogspot

How to Auto Show Image/Thumbnail Tooltip in Blogger / Blogspot:

Instructions To Follow:
STEP #1
Log in to Blogger, go to Layout -> Edit HTML
and mark the tick box "Expand Widget Templates"

STEP #2
Now find (CTRL+F) this code in the template:

]]></b:skin>


And immediately before it, paste this code:


#screenshot{ position:absolute; border:1px solid #ccc; background:#333; padding:5px; display:none; color:#fff; }


STEP #3
Now find (CTRL+F) this code in the template:

]]></b:skin>


And immediately after it, paste this code:

<script src='http://files-teckzest.bravehost.com/jquery.js' type='text/javascript'/><script src='http://files-teckzest.bravehost.com/main.js' type='text/javascript'/>


Now click "Save Template"

STEP #4 Log in to Blogger, go to Layout

Add a Gadget of HTML/JavaScript type.

Then add this code in to it:.

<span class="Apple-style-span" style="font-family: Verdana, Arial, sans-serif; font-size: 13px; color: rgb(51, 51, 51); line-height: 16px; ">WITHOUT TITLE <a href="http://bdlab.blogspot.com" class="screenshot" rel="http://i44.tinypic.com/2ag18jq.gif" title="" style="color: rgb(51, 102, 153); ">blogspot tutorial test</a> link.</span>


Now click "Save"

Finish

Source: bdlab

Thursday, November 17, 2011

How To Create Bubble Tooltip in blogspot / blogger

How To Create Bubble Tooltip in blogspot / blogger:

1.Login to your blogger dashboard--> layout- -> Edit HTML

2.Scroll down to where you see tag .

3.Copy below code and paste it just before the tag and save your template.


<style type='text/css'>
a.tt{
position:relative;
z-index:24;
color:#3CA3FF;
font-weight:bold;
text-decoration:none;
}
a.tt span{ display: none; }

/*background:; ie hack, something must be changed in a for ie to execute it*/
a.tt:hover{ z-index:25; color: #aaaaff; background:;}
a.tt:hover span.tooltip{
display:block;
position:absolute;
top:0px; left:0;
padding: 15px 0 0 0;
width:200px;
color: #993300;
text-align: center;
filter: alpha(opacity:90);
KHTMLOpacity: 0.90;
MozOpacity: 0.90;
opacity: 0.90;
}
a.tt:hover span.top{
display: block;
padding: 30px 8px 0;
background: url(https://blogger.googleusercontent.com/img/b/R29vZ2xl/AVvXsEh8eoB-qkhdpeEPpgL5euKiN89dZ47LNCk_t7dJ4EfrigmNAa7JDMbs9X0E11GYfNT00lKXupbZGD8YcQQS6wYHmU_msqdVmLkwZ5Hwi-1KNBvQmprpjmua5ldNiKrdCvhAR9oUlupMDMQT/) no-repeat top;
}
a.tt:hover span.middle{ /* different middle bg for stretch */
display: block;
padding: 0 8px;
background: url(https://blogger.googleusercontent.com/img/b/R29vZ2xl/AVvXsEg5V-TeMDmVO6hU_IoIrffEPhyki9yJGWrlm9-QxngIflaR0618GUOVJyzrTFhr7CVFiKvEToNlC1qw3MFKknKDtBKO4omGrV_A11G2Txixrfqpb251yVoafGx0m0JaleN8-AvsFjtYPhaV/) repeat bottom;
}
a.tt:hover span.bottom{
display: block;
padding:3px 8px 10px;
color: #548912;
background: url(https://blogger.googleusercontent.com/img/b/R29vZ2xl/AVvXsEh8eoB-qkhdpeEPpgL5euKiN89dZ47LNCk_t7dJ4EfrigmNAa7JDMbs9X0E11GYfNT00lKXupbZGD8YcQQS6wYHmU_msqdVmLkwZ5Hwi-1KNBvQmprpjmua5ldNiKrdCvhAR9oUlupMDMQT/) no-repeat bottom;
}
</style>


4.Now when you add a link use the below structure:

<a href="YOUR-LINK" class="tt">LINK-NAME<span class="tooltip"><span class="top"></span><span class="middle">YOUR-TOOLTIP-MESSAGE</span><span class="bottom"></span></span></a>


5. Look at the example below.

<a href="http://www.premiumbloggertemplates.com/" class="tt">Premium Blogger Templates<span class="tooltip"><span class="top"></span><span class="middle">Download Free Premium Templates Free</span><span class="bottom"></span></span></a>

It will look like this:

CSS Bubble Tooltips

Saturday, November 12, 2011

Cara Memasang Auto Tooltip di Blogger / Blogspot

Kali ini TreTan ngasih postingan tentang Cara Memasang Auto Tooltip di Blogger / Blogspot yang diambil dari Om Liubenz berikut caranya:

1. Pilih Rancangan
2. Pilih EDIT HTML (centang Expand template widget)
3. Sekarang simpan CSS berikut diatas kode </head>


/* start Tooltip blogger*/

body div#toolTip {
position:absolute;
z-index:1000;
min-width:150px;
background:#000000;
border:2px double #E80101;
text-align:left;
padding:5px;
min-height:1em;
-moz-border-radius:5px;
}

body div#toolTip p {
margin:0;
padding:0;
color:#ccc;
font:11px/12px trebuchet MS,arial,sans-serif;
font-weight:bold;
}

body div#toolTip p em {
display:block;
margin-top:3px;
color:#fff;
font-style:normal;
font-weight:normal;
}

body div#toolTip p em span {
font-weight:bold;
color:#fff;
}

/* End Tooltip blogger*/


4. Sekarang simpan script berikut diatas kode </head>


<script src='http://milikazis.googlecode.com/files/tooltipURL.js' type='text/javascript'/>
<script src='http://milikazis.googlecode.com/files/Tooltipz33s.js' type='text/javascript'/>


5. Simpan template dan Lihat hasilnya

Tuesday, November 8, 2011

Pantai Siring Kemuning di Bangkalan - Madura

Pantai Siring Kemuning yang terletak di Kecamatan Tanjung Bumi, Kabupaten Bangkalan, Madura ini merupakan Pantai yang cukup Eksotis untuk dikunjungi. Disana, kita bisa melihat keindahan Pantai yang airnya jernih serta memikat siapapun yang berkunjung kesana. Perjalanan untuk mencapai Pantai Siring Kemuning ini menghabiskan waktu sekitar 1 jam dengan mengendarai sepeda motor dengan kecepatan rata-rata 60Km/Jam. Perjalanan menuju Pantai Tanjung Bumi juga tidak kalah mengesankan. Hamparan padi serta bukit menemani disetiap perjalanan menuju Siring Kemuning.

Pantai Siring Kemuning - Bangkalan - MaduraFoto: http://nyapsab.org

Disana, kita tidak perlu repot mencari makanan karna telah tersedia makanan dan minuman. Makanan ini berupa rujak yang tentunya akan membuat anda ketagihan sambil menikmati panorama indahnya Pantai Siring Kemuning.


tags: Pantai, Siring, Kemuning, Bangkalan, Madura, nyapsab, liburan